Outside the Climax Brighton office where I work, there is a road. This consists of pieces of gravel embedded in tar. The size and spacing of the gravel is variable, but for the sake of argument, let's say it is on average about 2 centimetres from one lump to the next.
To represent this road surface in a texture, we will need at least 8 texels per pebble to maintain any degree of clarity. This means a detail texture sized 512 by 512 will cover 128 centimetres of unique real world surface, and will tile approximately once per metre.
Now let's suppose we have a game, running at 60 frames per second, in which a car is driving down this road at 100 kilometres per hour: a fairly typical game scenario. 100 kph is 27.7 metres per second, which is 0.46 metres per frame, or approximately half the distance covered by each tiling of our detail texture.
Whenever the frequency at which you are sampling some data reaches half the repeat rate of that data, you have a problem. This is a magical value called the Nyquist frequency, and when you hit it, things start to go wrong. In the case of moving too quickly over a repeating ground texture, the symptom of the problem is an optical illusion where the texture will appear to stop moving, then gradually start to slide in the opposite direction. This is the same thing that makes wagon wheels spin the wrong way in old cowboy movies, and can be immensely distracting!
An easy workaround would be simply not to put such high frequency detail in your texture, but that strikes me as rather a cop-out. Even using a larger and hence less tiled texture isn't enough to properly fix the problem, because as well as the one metre texture tiling frequency, individual pieces of gravel are repeating far more often, with a Nyquist velocity as little as 2 kilometres per hour! One piece of gravel will never be an exact copy of the next, so this is unlikely to cause the "scrolling backwards" illusion, but they are certainly similar enough to produce a chaotic and noisy visual effect, rather than the intended sense of a fast, smooth forward motion.
The rest of this article discusses the background issues of motion aliasing in more detail, and then presents a specific solution for the problem of tiled ground textures in the context of a racing game.
Computers deal in digital approximations, and whenever you take a digital sampling of a continuous function, aliasing occurs. Much of the science of computer graphics is devoted to minimising the effects of such problems, but relatively little of this deals with the time domain.
The ideal way to sample any continuous value is by integrating it over the range in question, but a fully correct mathematical integration is rarely practical in realtime. Common real world approaches work either by sampling the input data at a higher frequency and then scaling down to the output resolution, or by precalculating various blurred versions of the input data and then selecting between them based on the sampling frequency.
For instance, multisampling hardware addresses the problem of position aliasing for polygon edges by sampling their positions at a higher resolution than the final output.
Mipmapping deals with texture aliasing by choosing the most suitable from a set of pre-blurred copies of the texture, but this approach has a serious flaw. Mipmaps are generated entirely as a texture space operation, but their selection depends on the screen space projection of that texture. This is fine as long as the mapping from texture space to screen space is simple and undistorted, but in situations with extreme perspective, such as looking sideways along the length of a wall, the texture sampling frequency will be different along each axis, so there can be no single correct mip level.
This demonstrates a very important point. Because mipmapping uses precalculated data, it is extremely efficient, but because it operates in the wrong coordinate system, it can only ever be a rough approximation, no matter how useful it may turn out to be in practice.
Anisotropic filtering, on the other hand, tackles the same problem as mipmapping, but in the correct coordinate system. It works by transforming the screen space extents of each pixel back into the texture space where the filtering is being carried out, and then taking multiple samples spread over this area. This cannot be precalculated, but gives higher quality results at a correspondingly greater runtime cost.
Movies run at 24 frames per second, and television at 25 or 30 fps depending on your choice of continent. I've yet to hear anyone mention this as a problem, but if an action game dropped to such low framerates, gamers would be up in arms!
Partly this is because games are interactive, so fast updates are more important than for read-only media, but it is also because film and TV have good temporal antialiasing, while games generally do not. A physical camera naturally provides high quality motion blur, accumulating all the light it receives over the duration of the exposure time. Every now and then a director will play around with this for artistic effect, for instance Spielberg using a very short exposure to give a deliberately aliased, gritty feeling to parts of Saving Private Ryan, but in general, the interaction between light and film automatically does the right thing to produce a nice smooth result.
We programmers are not so lucky. If we want motion blur, we have to program it ourselves.
The ultimate solution is to supersample in the time domain. If your final game is running at 60 fps, you could render intermediate frames at 120 or 240 fps, and blend these together before presenting the results. This might actually be a sensible way of spending the extra horsepower if you ever find yourself running on hardware more capable than your original target spec, but few of us can generally afford the cycles to render our entire scene multiple times.
Lacking a practical fullscreen motion blur capability (other than the crude "blend in some amount of the previous frame" trick, which can be useful as a special effect but doesn't actually address the underlying aliasing), we have to concentrate on just the few places where temporal aliasing is causing the most objectionable artifacts, and find one-off solutions for each of these specific problems. When a character swings a sword, draw an alpha blended polygon to simulate a motion trail. If an object is travelling unusually quickly, render it a second time with a shader that displaces vertices along the axis of motion. If one particular texture is strobing too badly, change it to make the problem go away�
The easiest way of dealing with a problematic texture is simply to fade it out as the speed of motion increases, in a kind of temporal equivalent of mipmapping. This is trivial to do using the D3DSAMP_MIPMAPLODBIAS renderstate, but the results don't look so great: although it does fix the strobing, we also lose all the detail from our texture. It would be better to do something more like anisotropic filtering along the time axis, rather than this simplistic global blur.
The ability to precalculate is crucial, however. Anisotropic filtering hardware is not programmable, and even if it was, high end cards typically only provide something like 16 tap anisotropic filters, while our camera is moving a lot faster than 16 texels per frame! This would be prohibitively expensive to emulate in a pixel shader.
Motion happens in world space, but a precalculated solution would be easiest in texture space. A direct mapping between these two spaces only exists if the following conditions are met:
The first condition can be trivially enforced: use a planar mapping to generate the detail texture UV coordinates, and tell your artists never to manually edit these.
The second condition is unlikely to be true, but probably close enough that you can get away with ignoring the minor inaccuracy.
The third condition is almost certainly not true, but hey. Look over there, it's Superman! I'm just going to ignore this, pretend it doesn't matter, and do my best not to feel guilty about it�
So now the rendering process is:
The nice thing about this approach is that it is entirely a preprocess. Once a blurred version of the texture has been created, any kind of subsequent rendering can continue as normal, substituting this modified texture into the existing pipeline.
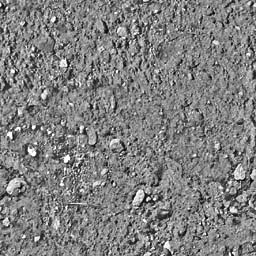
These images, taken from the accompanying sample program, show the technique in action with a particularly difficult texture, both still and at high speed. The inset in the top left corner shows the contents of the generated rendertarget texture:
|
|
Pixel shader 2.0 is good at image processing, but it would be nice if we could use this technique on older hardware, and even on the latest and greatest cards, applying large blur kernels to large textures is still expensive.
Our input is a 2D texture. The blur is controlled by a pair of direction and amount parameters, so in total this is a 4 dimensional problem. But there is no such thing as a 4D texture, beside which, precalculating so much data would take up a ridiculous amount of space.
Ignoring the blur amount for a while, we could just precalculate images for a number of different blur directions. Because a directional blur is symmetrical between forwards or backwards motion, we only need to bother with half of the circle, so 64 different images allows one for every 2.8 degree change in direction. By lerping between the two closest rotations as the angle changes, this is easily enough to create smooth changes of blur direction: in fact, as few as 32 rotations can be acceptable.
64 rotated copies of a 512 by 512 texture adds up to 8 megabytes even in DXT1 format, but this can be dramatically reduced. Having blurred the image along one axis, we can then scale it down along this same axis without losing any significant detail, as shown by these images:
|
|
|
This obviously only works when the blur direction is along the horizontal or vertical axis, so we need to make sure that will always be the case. This means rotating each image by the opposite of the blur angle, then blurring it horizontally and shrinking horizontally. At runtime, modify the texture coordinates so as to rotate it back in the opposite direction.
When you rotate a square image, the resulting shape can go outside the bounds of the original, but will always lie inside the circle with radius sqrt(2) larger than the texture width:
 |
To avoid cropping the corners, before rotating you must shrink around the centre by a factor of sqrt(2), filling the borders with a repeating tile of the original data. The file blurdetailtexture.cpp from the sample program shows one implementation of this, and the lerpDetailBlur() function from detail_demo.cpp shows how to rotate it back to the original location at runtime.
The blurred image width can be dropped to 32 pixels with negligible quality loss, and often as low as 16 or even 8, taking the total data size down to as little 128 or 256k.
With just a single precalculated image for each blur direction, we have no way to smoothly vary the amount of blur, although we can do a simple crossfade to the original non-blurred texture (as shown in the sample program if you set the blurring technique to "full color, single channel").
Ideally we would like to store an image for every possible combination of blur amount and direction, but that would explode the size of the dataset. In the particular case of a monochrome texture, however (which is often the case for detail maps), we have a spare data axis across the three color channels. We can encode three different blur levels into the red, green, and blue components of a single DXT1 texture for no extra storage cost:
|
|
|
|
|
Due to the nature of the DXT encoding scheme, this sort of data packing can increase the compression lossyness, but the results are still acceptable.
The runtime texture blurring shader now reads from three sources: the original non-blurred, non-rotated image, and the two packed rotation textures closest to the desired angle. It also takes three constant inputs:
The caller should ensure that (rot_dot.r + rot_dot.g + rot_dot.b + base_amount) is normalised to one. Gradually decreasing one of these values and increasing another can smoothly fade between a total of four distinct blur amounts.
The final shader is:
    float3 base = tex2D(base_texture, base_uv);
    float3 rot1 = tex2D(rot1_texture, rot1_uv);
    float3 rot2 = tex2D(rot2_texture, rot2_uv);

    float3 rot = lerp(rot1, rot2, rot_lerp);

    return dot(rot, rot_dot) + (base * base_amount);
Not only does this work with pixel shader 1.1, but it can even be implemented on fixed function DX7 hardware if you are willing to split it over a couple of passes.
So far we have developed a temporal equivalent of anisotropic filtering, implemented as a texture space preprocess using precalculated data. This is highly efficient, but depends on the direction of motion being transformed from world space into texture space. The technique works well for a vehicle driving over a flattish, planar mapped surface, but it cannot deal with arbitrary texture mapping or geometry, and there is a fundamental approximation in the way it handles camera rotation and perspective.
With a shader 2.0 card, it is possible to fix all these problems. Precalculate and pack multiple rotated images as described above, but leave out the render-to-texture stage. Instead, make all the rotated images available to the main scene shader by stacking them in a volume texture. Per-pixel, this shader can then evaluate a localised direction of motion, use a set of tangent space vectors to transform it into texture space, make a local selection between the various rotated and blurred images, and then lerp between them as described above.
This would be an extremely expensive shader, however, and the low tech approximation produces good results when used within the right constraints. Is a more robust implementation really the most worthwhile use of shader cycles? I suspect not.
A more practical use of newer hardware is to perform the render-to-texture blur in realtime, rather than using precalculated data. This can give smoother transitions between different blur amounts and directions, at the cost of fillrate.
This sample program lets you compare the precalculated technique with a realtime render-to-texture blur, or using mipbias to fade out the detail texture, or no blurring at all. Click on the main 3D scene to focus it, then use the arrow keys to move around. Use the attributes pane on the right to try out different textures, change the precalculated image size and number of rotations, and choose between a monochrome image holding three different blur levels or a full color image with only a single amount of blur.
MotoGP 2 (Xbox and PC), developed by Climax and published by THQ, uses the precalculated detail texture blurring technique described in this article. MotoGP 1 used mipbias to fade out the detail texture as speed increased.